Mon Char, Body Work
I've been awfully quiet lately. It's probably because all of my efforts have
been going into fixing my car's body while the weather still accomodates
painting.
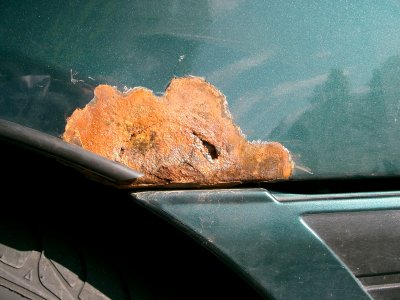
The story starts last year, when I noticed paint behind my driver's side rear wheel bubbling. By the end of winter this year, the bubbles had gotten enormous. This is where most cars develop rust, and in this case, it's the worst rust this twelve year old car has. Last month I couldn't take it any more, bit the bullet, and peeled off the giant bubble.
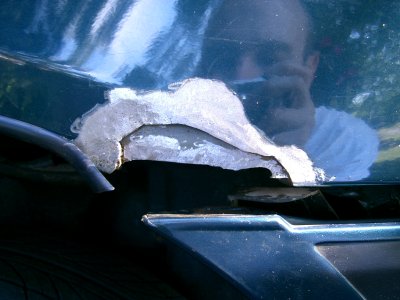
The rust was bad. Toward the bottom, there was really nothing left. My finger easily pushed through. This is unfortunate, since that's the part of the fender the rear bumper trim is attached to. On the bright side, the inner steel wall was in better condition, with shiny primer clearly visible. Removing rust is a very exacting process; it absolutely has to be removed entirely, so I used a dremel tool with various grinding bits and worked at it until all the soft porous iron oxide was gone. Rust may look shiny when polished, but like cancer, the whole tumour needs to be removed. I then applied an etching solution several times to make sure any rust left was properly treated and sealed.
A typical Bondo-only repair is never good, there needs to be some structural support. Also, because the part I removed had to actually a screw of the bumper trim, there needed to be something rigid. Typically, body shop workers use steel. I formed the bottom lip out of fiberglass, since I don't have tools for steel. The cloth extends far up inside the fender well so that there is a large surface it holds on to. The bare steel was primed, as Bondo seems doesn't adhere directly to steel as well.
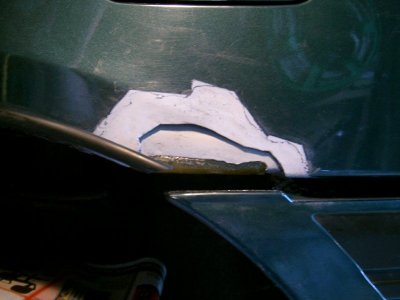
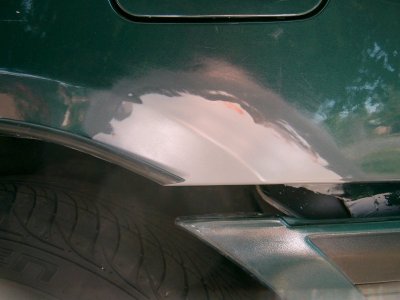
Several layers of Bondo and spot putty followed. Getting the shape of the curve to match the steel contour was quite difficult.
At this point, I used a thick asphalt undercoat with rubber to seal the surface exposed on the inside of the wheel well. It took several coats. It should keep the salt out of the fiberglass and especially from soaking into the porous Bondo. A thick coat of primer was applied to the outside surface and sanded smooth.
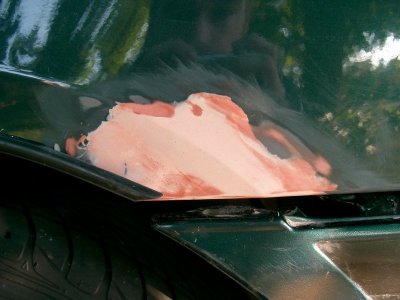
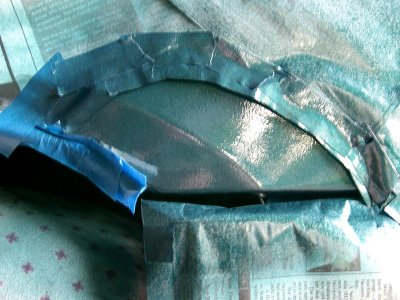
I decided to go and shell out the money for a custom made spray bomb of Dupont exact match laquer. The area was masked such that the tape at the edges was not stuck directly to the surface. This was done to prevent a sharp edge of paint.
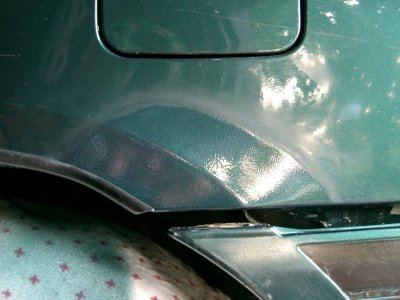
Twenty minutes later, when the mask was removed, the desired feathering is there. Unfortunately, the new paint is slightly bluer than the existing paint, probably due to fading. Nonetheless, it's as good as it is going to get; there is just nothing I can do about that.
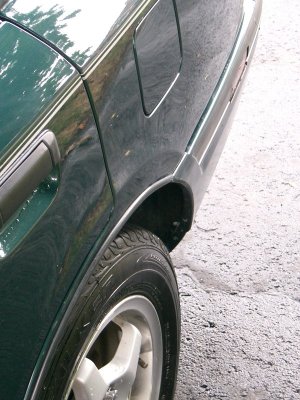
The final steps of the paint job are the ones that seem impossible. The shiny finish needs to be sanded to remove the "orange peel" texture and then somehow magically buffed back to a shine that matches the rest of the car's finish. I never thought that that could actually be done without a top clearcoat. Thankfully, I was wrong. Using 1500 grit sandpaper, followed by polishing compound applied with an old sock, along with plenty of water, I managed to match the luster of the finishes.
The entire project turned out fairly well. Most people would not notice anything had been done. Looking straight at the area, the difference in paint colour is quite apparent, however. Also, I did not mention that the fibreglass reinforcement took two tries, since I used stale resin on the first attempt. Finally, the paint finish took not one, not two, but three tries to get right. I think it has something to do with the primer. So, my repair work is not perfect, but it is good enough. It was a very educational three weeks.

